
Building a light-weight Kubernetes cluster with Raspberry Pi and k3s
 Here at Boogie Software, our experts are using Kubernetes and container technology every day in several projects, and thus, we were quite intrigued to find out how Kubernetes works on-premises with more modest hardware. In this post, I will describe how we built a light-weight bare metal cluster on Raspberry Pi boards for running applications and services in our company network. There were really two reasons for doing this project. Firstly, by setting up the cluster we get a platform where we can reliably and flexibly run our company network internal apps and services. Secondly, this was a nice opportunity to learn more about Kubernetes technology, microservices and containerisation. For those who are interested in following these steps or building a similar system, it is recommended to have at least a basic knowledge about Docker containers, Kubernetes concepts (nodes, pods, services, deployments etc.) and IP networking.
Hardware setup
- At least one Raspberry Pi 2B/3B/3B+. You can run some apps even on a single board but getting two or more boards is recommended for spreading the load and for increased redundancy.
- Power supplies and SD cards for the Pis, an ethernet switch or free ports in your existing one, and some cables.
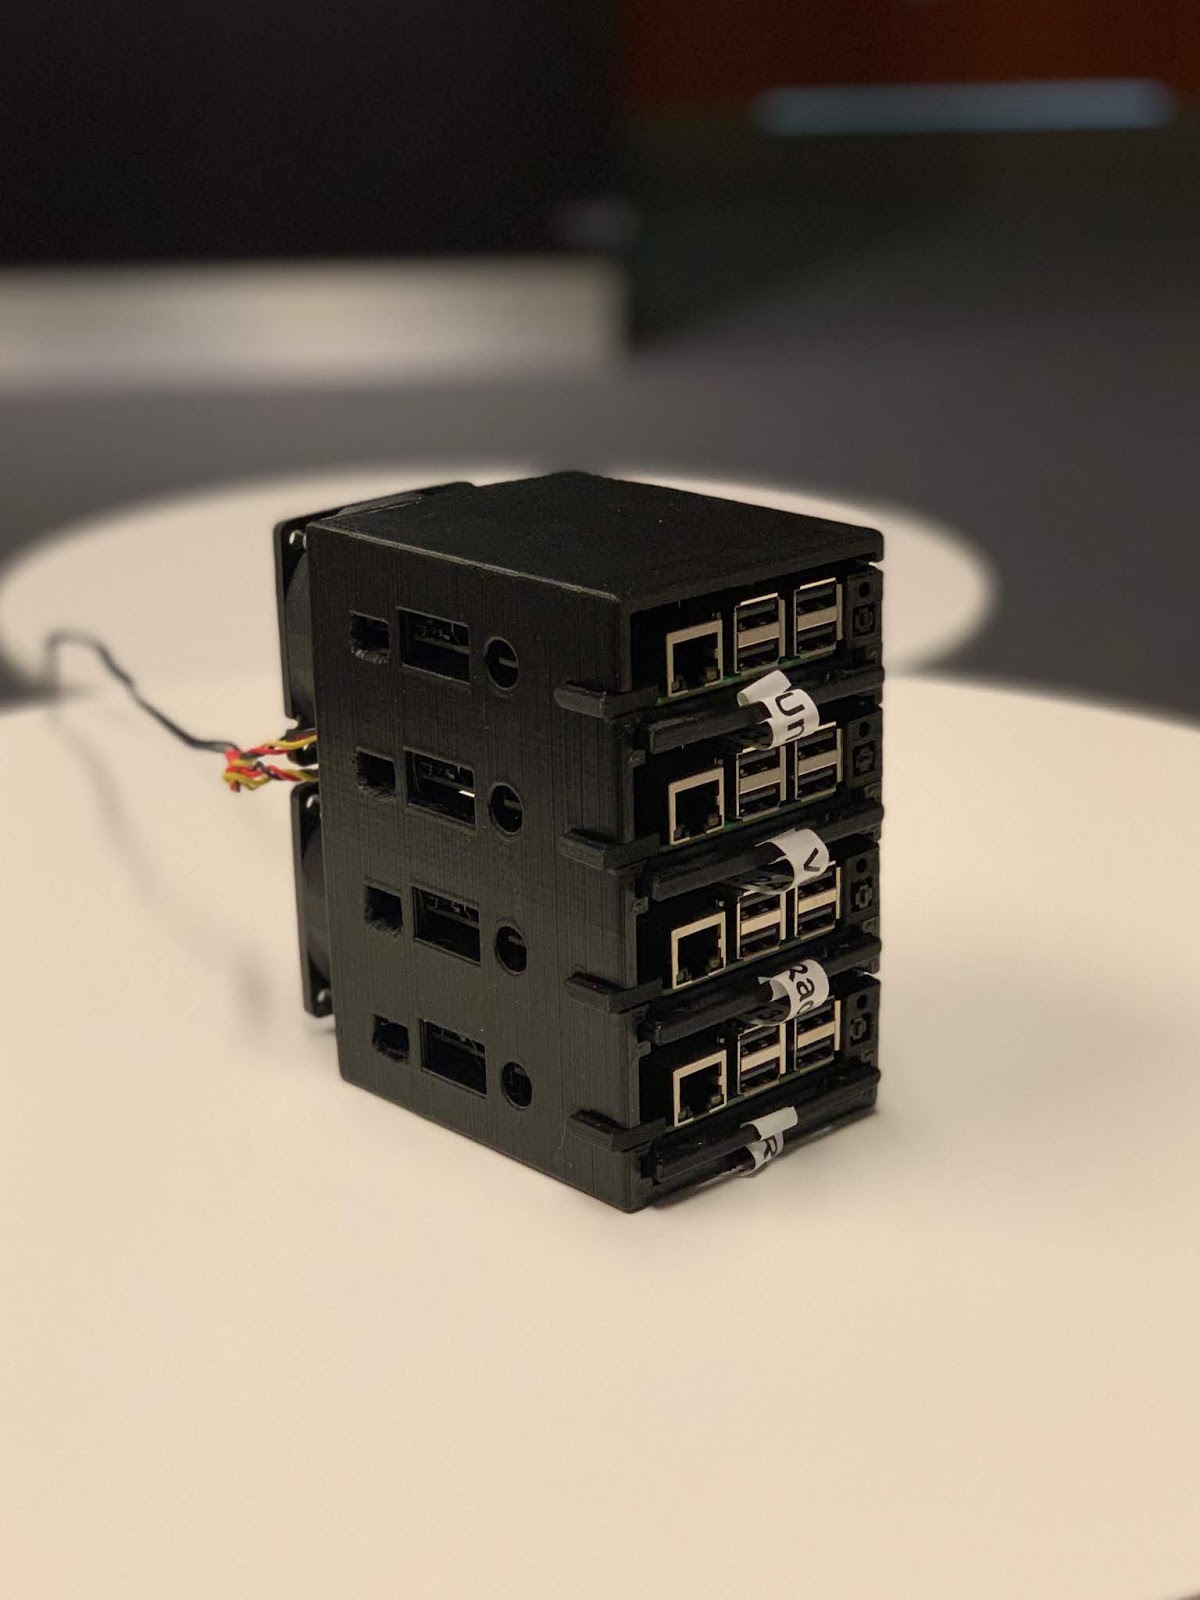
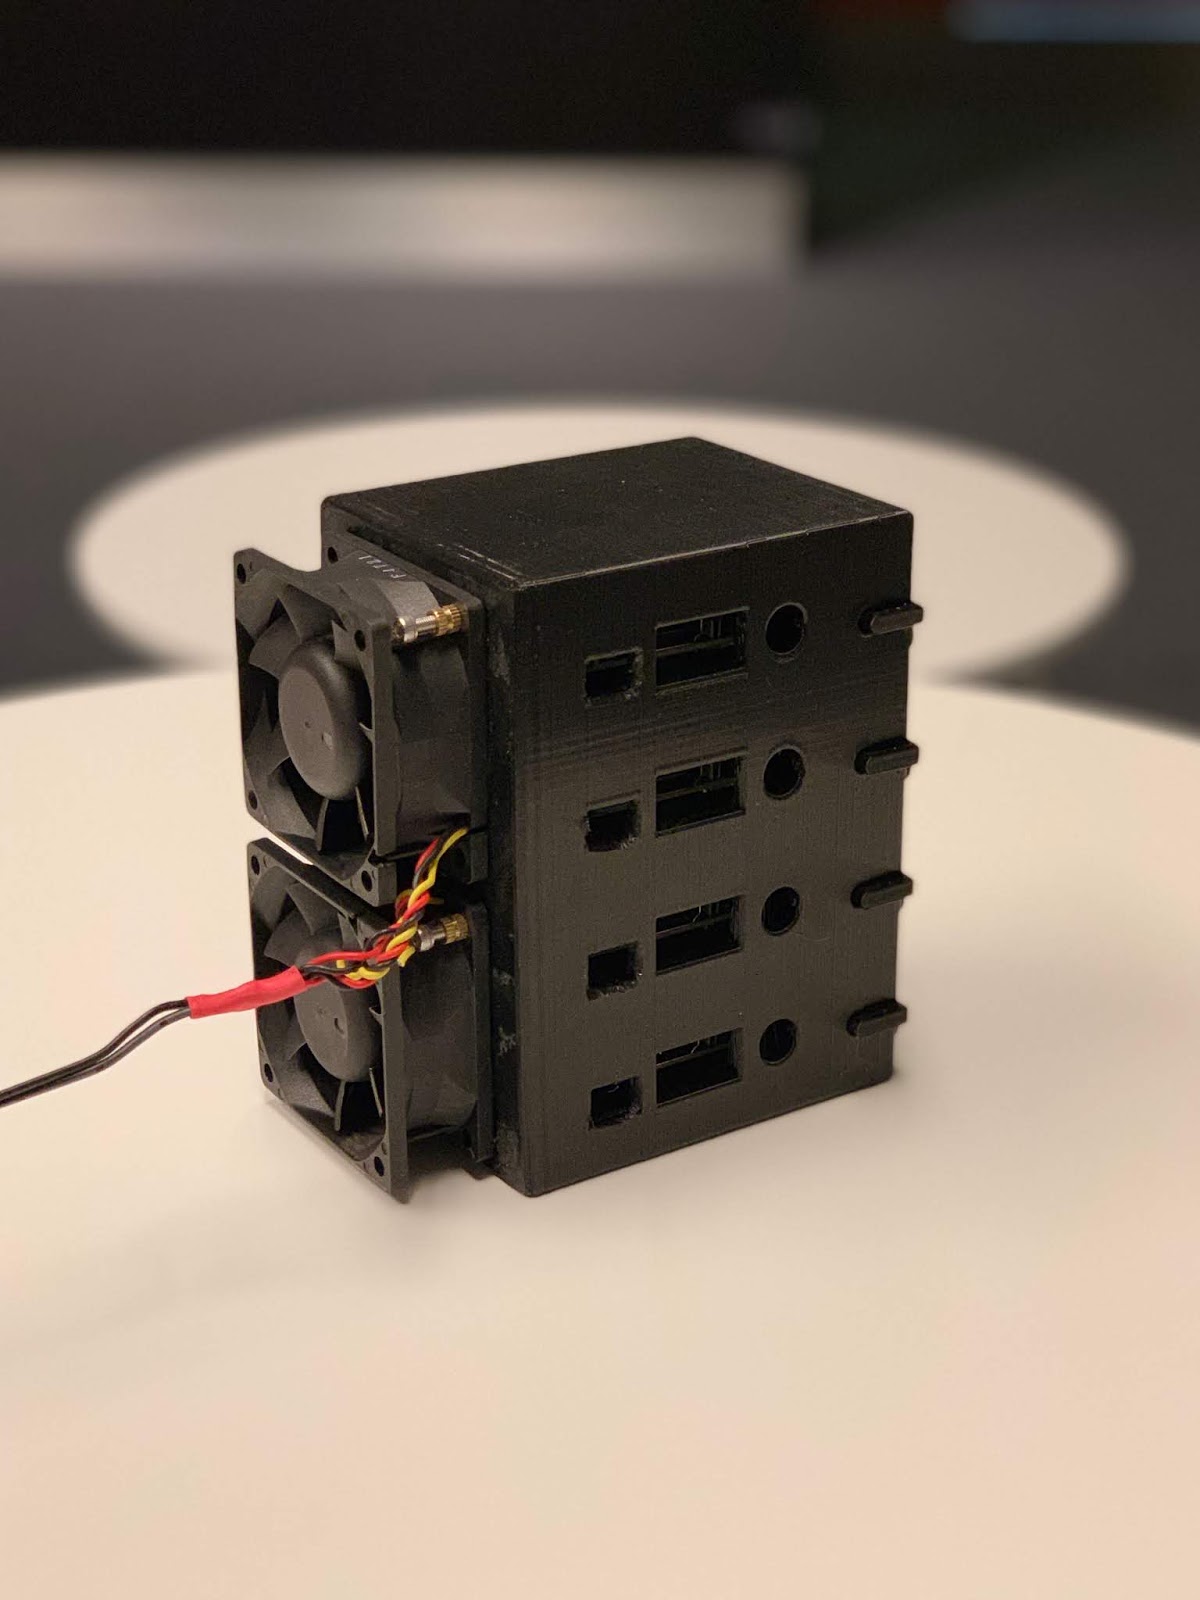
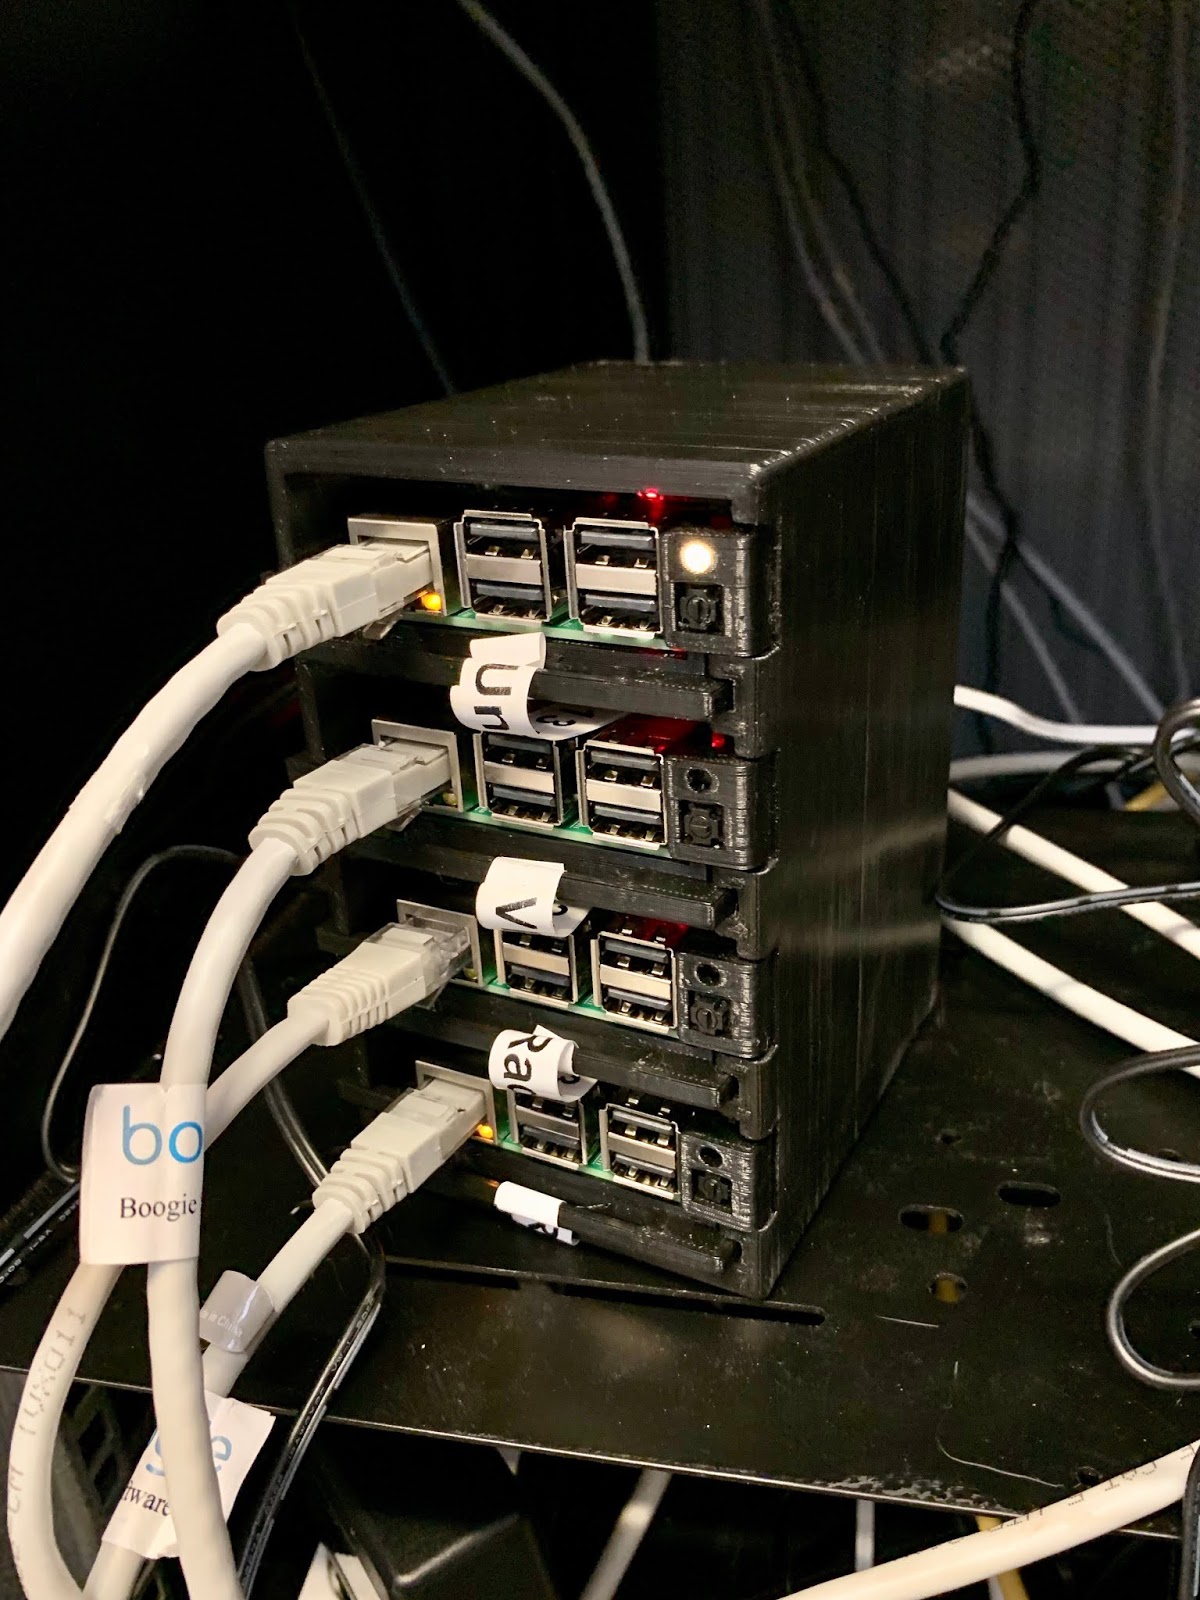
In our setup, we currently have four Raspberry Pi 3 Model B+ boards, so in the cluster, there is one master/server and three agent nodes. The Raspberry Pi boards of course need some kind of housing and this is where things got a little out of hand. A fellow Boogieman who is very able with CAD and 3D printers designed and printed a neat case for the boards, which would deserve a story on its own. The casing has two fans for cooling in the back and each board sits on a tray that can be hot-swapped in and out for maintenance. The trays also have places at the front for an activity/heartbeat LED and a shutdown/power switch that both connect back to the board’s GPIO header.
 |
 |
Software stack
K3s will run pretty much on almost any Linux distribution, and we decided to go with Raspbian Stretch Lite as the base OS because we don’t need any additional services or desktop user interfaces on the boards. K3s does require cgroups to be enabled in the Linux kernel, and this can be done on Raspbian by adding the following parameters to /boot/cmdline.txt:
| cgroup_enable=cpuset cgroup_memory=1 cgroup_enable=memory |
Installing k3s
The authors of k3s have done a nice job with smoothing the installation process. Once you have your server hardware ready, it is super easy to setup in just a couple of minutes: it takes only one command to install the server (master node):
| curl -sfL https://get.k3s.io | sh – |
and the same goes for agent nodes:
| curl -sfL https://get.k3s.io | K3S_TOKEN=<token_from_server> K3S_URL=https://<server_ip>:6443 sh – |
where token_from_server is the contents of the file /var/lib/rancher/k3s/server/node-token from the server and server_ip is the IP address of the server node. At this point, our cluster was already up and running, and we could start deploying workloads:
| root@k3s-server:~# kubectl get nodes | |
| NAME STATUS ROLES AGE VERSION | |
| k3s-node1 Ready <none> 40s v1.13.4-k3s.1 | |
| k3s-server Ready <none> 108s v1.13.4-k3s.1 |
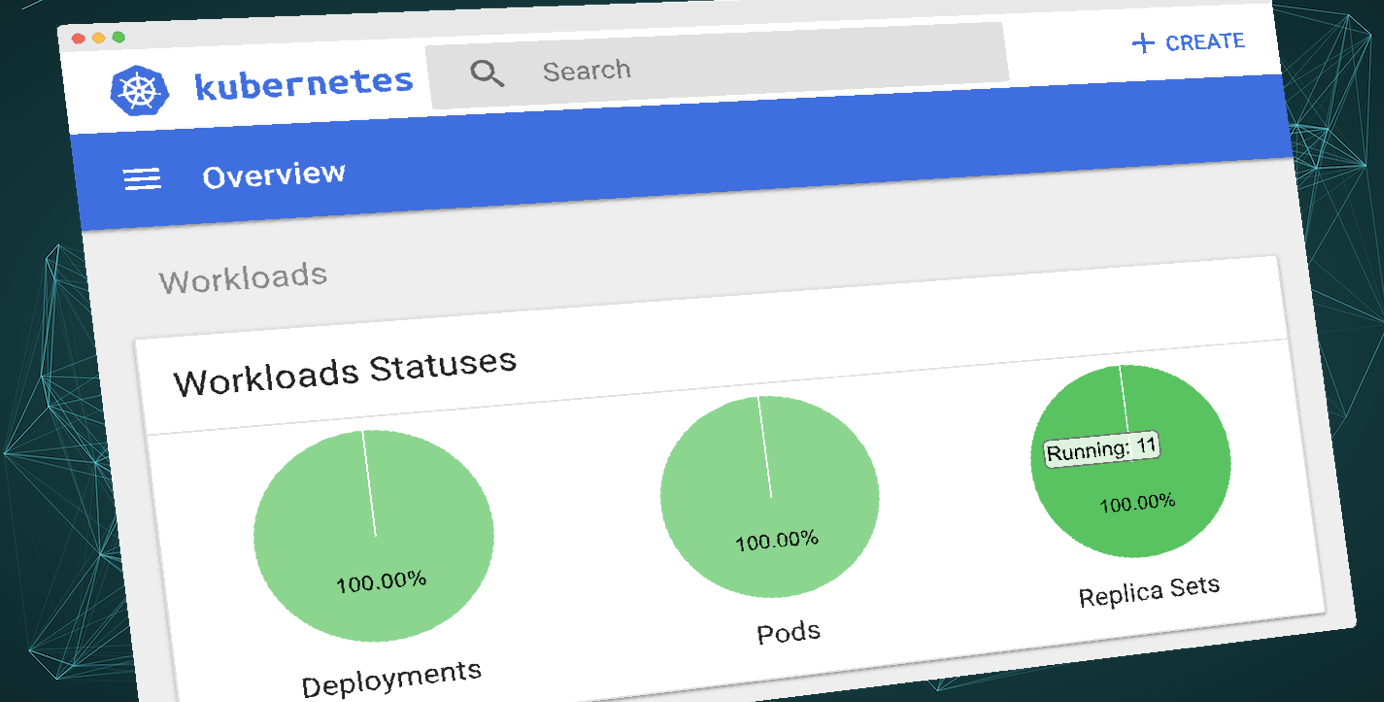
For administering and monitoring the cluster, we installed Kubernetes Dashboard, which provides a convenient web interface for checking the overall system status, performing admin operations and accessing logs. Installing and running kubectl command locally is also very helpful because it allows administering the cluster from your own computer without needing to ssh into the cluster. To do that, you just install kubectl and copy the cluster information from the server node config /etc/rancher/k3s/k3s.yaml into the local kubeconfig file (usually ${HOME}/.kube/config).
Exposing the services with a load balancer
ClusterIP). To make them reachable from outside the cluster, there are two options. You can either configure the service with the type NodePort, which exposes the service on each node’s IP at a static port, or you can use a load balancer (service type LoadBalancer). NodePort services are, however, quite limited: they use their own dedicated port range and we can only differentiate apps by their port number. K3s does also provide a simple built-in service load balancer but since it uses the nodes’ IP addresses, we might quickly run out of IP/port combinations and binding the services to a certain virtual IP is not possible. For these reasons, we decided to deploy MetalLB – a load-balancer implementation that is intended for bare metal clusters.MetalLB can be installed simply by applying the YAML manifest. The simplest way to run MetalLB in an existing network is to use the so-called layer 2 mode, which means that the cluster nodes announce the virtual IPs of the services in the local network with ARP protocol. For that purpose, we reserved a small pool of IP addresses from our internal network for the cluster services. The config for MetalLB thus looked like this:
| apiVersion: v1 | |
| kind: ConfigMap | |
| metadata: | |
| namespace: metallb-system | |
| name: config | |
| data: | |
| config: | | |
| address-pools: | |
| – name: company-office | |
| protocol: layer2 | |
| addresses: | |
| – 10.10.10.50-10.10.10.99 |
With this config, the cluster services would be exposed at addresses in the range 10.10.10.50-10.10.10.99. To bind a service to a specific IP, you can use the loadBalancerIP parameter in your service manifest:
| apiVersion: v1 | |
| kind: Service | |
| metadata: | |
| name: my-web-app | |
| spec: | |
| ports: | |
| – name: http | |
| port: 80 | |
| protocol: TCP | |
| targetPort: 8080 | |
| loadBalancerIP: 10.10.10.51 | |
| selector: | |
| app: my-web-app | |
| type: LoadBalancer |
It is with load balancing where we saw most of our challenges. For example, Kubernetes has a limitation that prevents having both TCP and UDP ports in a single load balancer service. To work around that, you can define two service instances, one for TCP ports and another for UDP ports. The downside is that then you will run these two services in different IP addresses, unless you enable IP address sharing. And as MetalLB is a young project, there was a small wrinkle with this as well, but we are confident that all these will be ironed out soon.
Adding storage
Cross-building container images for ARM
| FROM arm32v7/alpine:latest |
The second thing to note is that your host Docker needs to be able to run ARM binaries. If you are running Docker for Mac, things are easy because it has built-in support for this. On Linux, there are a few steps that you must take, outlined below.
Adding QEMU binary into your base image
qemu-arm-static binary into the image during build, e.g. by adding the following line into your Dockerfile:| COPY –from=biarms/qemu-bin /usr/bin/qemu-arm-static /usr/bin/qemu-arm-static |
Then, QEMU needs be registered on your host OS where you create your Docker images. This can be achieved simply with:
| docker run –rm –privileged multiarch/qemu-user-static:register –reset |
This command can be added into your build script before building the actual image. To wrap things up, your Dockerfile.arm would look e.g. something like this:
| FROM arm32v7/alpine:latest | |
| COPY –from=biarms/qemu-bin /usr/bin/qemu-arm-static /usr/bin/qemu-arm-static | |
| # commands to build your app go here… | |
| # e.g. RUN apk add –update <pkgs that you need…> |
and your build/CI script is essentially:
| docker run –rm –privileged multiarch/qemu-user-static:register –reset |
| docker build -t my-custom-image-arm . -f Dockerfile.arm |
which will give you an ARM architecture container image as a result. For those who are interested in the details, there is more information available on cross-building and if your registry supports v2.2 manifests, the different architectures can be even combined into a multi-arch image.
Automating builds and registry uploads
.gitlab-ci.yml file for the project. In our case it looked like this:| image: docker:stable | |
| stages: | |
| – build | |
| – release | |
| variables: | |
| DOCKER_DRIVER: overlay2 | |
| CONTAINER_TEST_IMAGE: ${CI_REGISTRY_IMAGE}/${CI_PROJECT_NAME}-arm:${CI_COMMIT_REF_SLUG} | |
| CONTAINER_RELEASE_IMAGE: ${CI_REGISTRY_IMAGE}/${CI_PROJECT_NAME}-arm:latest | |
| before_script: | |
| – docker info | |
| – docker login -u gitlab-ci-token -p $CI_JOB_TOKEN $CI_REGISTRY | |
| build_image: | |
| stage: build | |
| script: | |
| – docker pull $CONTAINER_RELEASE_IMAGE || true | |
| – docker run –rm –privileged multiarch/qemu-user-static:register –reset | |
| – docker build –cache-from $CONTAINER_RELEASE_IMAGE -t $CONTAINER_TEST_IMAGE . -f Dockerfile.arm | |
| – docker push $CONTAINER_TEST_IMAGE | |
| release: | |
| stage: release | |
| script: | |
| – docker pull $CONTAINER_TEST_IMAGE | |
| – docker tag $CONTAINER_TEST_IMAGE $CONTAINER_RELEASE_IMAGE | |
| – docker push $CONTAINER_RELEASE_IMAGE |
Now that we have our images in the container registry, we just need to deploy them into our cluster. To grant our cluster access to the registry, we create a deploy token in GitLab and then add the token credentials into the cluster as a docker-registry secret:
| kubectl create secret docker-registry deploycred –docker-server=<your-registry-server> –docker-username=<token-username> –docker-password=<token-password> –docker-email=<your-email> |
After that the deploy token secret can be used in the YAML file PodSpec:
| imagePullSecrets: | |
| – name: deploycred | |
| containers: | |
| – name: myapp | |
| image: gitlab.mycompany.com:4567/my/project/my-app-arm:latest |
With all these pieces in place, there we finally have it: an automated CI/CD pipeline from source code to ARM container images in a private registry, ready to be deployed into the cluster.
Conclusions
 All-in-all, it turned out that getting your own bare-metal Kubernetes cluster up and running was easier than expected. There are some rough edges and limitations coming from the fact that this technology has its roots in the cloud but nevertheless, k3s proved to be a sound choice for running containerised services at the edge and on lower-spec hardware in general.